I suspect there is going to be a love/hate relationship between me and my overlocker at least for the foreseeable future!
Said overlocker has been sitting on the table in my sewing room since I bought it at the end of last year at a bargain price from LIDL. I read the manual, checked out Portia’s tutorials on Makery and decided I needed adult supervision. Thankfully I received this by way of a course at Fabric Godmother – a Christmas present from my parents. My sister made the voucher!
Saturday was the big day and I headed off to Hove with my overlocker in the car. W very kindly drove me – mostly because he wanted to spend a sunny day in Brighton with the added advantage of parking at my sister’s house and spending the day with her. One of their activities involved him posing in a Punch & Judy stand – I have no idea what was going on there! We also paid a flying visit to Emmaus on the way and acquired a lovely little copper iron which has subsequently been used to successfully apply wax to his skis. Here it is being heated up on the hob.


Back to more serious things. There were five of us on the course and there was plenty of room for everyone to spread out to work. Tea and coffee flowed and there were even cute little cupcakes. The lovely tutor, Julia, was very patient as two of us were complete beginners and slightly terrified of our machines. Everyone’s machine was already threaded (mine came out of the box with starter threads in place) so we started by learning how to tie on new threads and pull them through – very easy and at that point I thought perhaps I’d just never unthread it. Not a chance – we then had to cut the threads, pull them all out and do it ourselves from scratch.
Amazingly I managed to do this without too much difficulty, although stupidly I hadn’t twigged that we had four different colour threads for a reason, i.e. to match the colour coding on the machine so that just made life even more difficult for me. Here’s the machine all threaded up. I was so excited I had to post a picture on IG straightaway!


I even took a photograph of the tension settings so I wouldn’t forget where they were originally. What I want to know is who the heck actually came up with the idea for this monster? At least I pretty much understand how the sewing machine works and when it goes wrong I’m happy to poke around to try and sort it out. The insides of the overlocker are a complete mystery at the moment.
There were piles of scrap calico to experiment with and the tension on my machine seemed to be the best behaved with everything looking pretty good straightaway. We played around with different fabrics, altering the tension to suit each one. We then :
- Learned about the differential feed
- Changed stitch lengths
- Removed a needle and disengaged the stitch finger to reduce the stitch width
- Sewed a blind hem.
My first problem was with the sample of chiffon which became completely entangled and I had to spend some time with tiny scissors and the tweezers poking it all out. Not to worry, I have no plans to make something in chiffon.
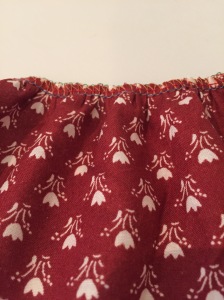
One of the things that impressed us was being able to do gathering by changing the differential feed. Apparently there is also a special foot you can use that gathers one piece of fabric whilst keeping the other one flat.
Here’s my gathering sample – I’ve just realised the flowers are upside down!
The final event of the day was making either a snood or a skirt with an elasticated waist. We were invited to take our own fabric but everyone chose to pick and buy something on the day. A difficult choice given we were surrounded by fabric.


My mistake was to choose a really lovely jersey – with raised stripes. There was obviously no way that I was going to be able to match the stripes as the day was almost over and we wanted to try and finish. We drew up our own patterns direct onto the fabric with chalk, based on our waist and hip measurements. My first go at seams was pretty good but I had made the tube too big having measured myself over three layers of clothing. Whizzing down the seam again threw everything out. The elastic went in quite well, although I think I cut it a bit too short so there was some undesirable bunching. However, all in all I was quite pleased with it and having thought I would never wear a jersey skirt I decided I probably would.
Julia then demonstrated a blind hemming technique which gives a band effect at the bottom of the skirt. I decided to wait until I got home to try this as we were running out of time and I didn’t want to rush it …. and this is where it all went wrong. I pinned everything in place last night, checked the machine on a scrap of folded fabric and then launched into the real thing. The machine went haywire with crazy loopy stitching all over the place. I then spent about an hour unravelling everything and re-threading with much weeping and wailing (actually it was more like much swearing). It is now working again but the hem was ruined and having chopped it all off to start again I’ve ended up with a skirt that only a child could wear as it is so short.
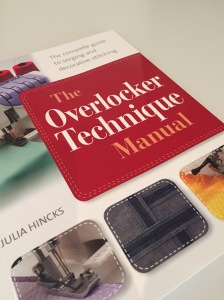
I shan’t give up. I can see what an advantage an overlocker will be so I’m going to buy some more fabric without stripes (maybe a scuba knit) and have another go at the skirt. I thought I’d also try some nice simple projects – maybe a plain t-shirt and a cover for the overlocker – to build up my confidence. In the meantime I have Julia’s book to study.
I really enjoyed the day, it was very relaxed, the other students were lovely and I would definitely recommend it to overlocker virgins. One very important thing to report is that despite being surrounded by all that fabric I didn’t buy any, apart from the piece to make my skirt. Such restraint.
